--------------------------------
This is a write-up of PentesterLab’s Bootcamp course. They describe it as a “learning path to get into security and especially web penetration testing”. I will write this guide as I complete the course as a way of consoldating my own knowledge and, if possible, to help others with their own learning. The online community has given so much to me for free that I am more than happy to do the same if anyone needs the help. If you see any errors or want to suggest I do something different, please contact me to let me know.
Write-up parts 1, 2, 3, 4, 5.1, 5.2, 6.
--------------------------------
                   * * * [ DISCLAIMER ] * * *
/*
 * All information in this write-up is, to the best of my knowledge,
 * truthful and accurate. However, I am only new to this, and I am
 * learning as I go, so it is entirely possible something contained
 * within this write-up is incorrect in some way. Never execute any
 * command, without knowing for sure what it is you are doing. Look
 * at the man pages of all commands if you do not understand them.
 *
 * I take no responsibility if you decide to use this information
 * to commit illegal acts. If you attempt to use these techniques
 * against devices or networks you do not either own, or have
 * permission to attack, you could end up in prison.
 *
 */
--------------------------------
--[ Step 1 ]
The first step is a relatively straight forward one: install Linux in a VM, and learn a scripting language. I will go through the steps to install VirtualBox on my Ubuntu system, and then installing a Linux distro inside VirtualBox. I will then post some links to the resources I used to learn Python.
--------------------------------
--[ Installing VirtualBox ]
To install VirtualBox from the Ubuntu repositories run the following command into your terminal:
$ sudo apt-get install virtualbox-5.0This will give you the Ubuntu packaged VirtualBox. If you’re after the Oracle version, or a version for a different Linux distribution see the instructions on the VirtualBox website.
I didn’t need to add the Oracle repository to my /etc/apt/sources.list as I believe the Ubuntu version of VirtualBox is on the repositories already listed.
--------------------------------
--[ Retrieving Linux ISO ]
To install a Linux distro in VirtualBox you need to download an ISO image from a legitmate source. There are several different distributions that will work for this, however, I have chosen to go with Xubuntu 16.04 LTS. I chose this distro as it is stable and quite easy to install, and with the Xfce desktop environment, is quite lightweight and configurable. I torrented the 64-bit system download from the Xubuntu site.
--------------------------------
--[ Installing Xubutnu into VirtualBox ]
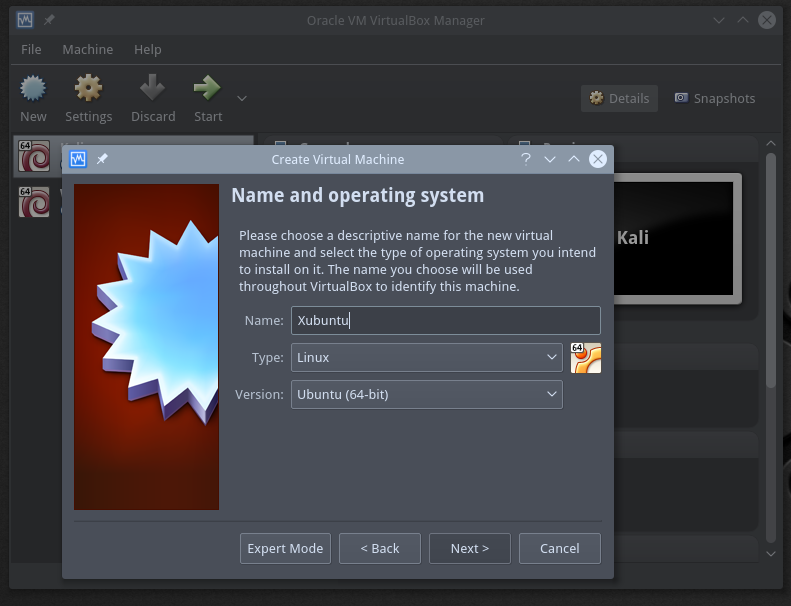
First open VirtualBox and click in the top left corner where it says “New”.
Enter the name of your virtual computer and select (if it does not do so automatically) Linux, Ubuntu (64-bit) from the drop down menus.
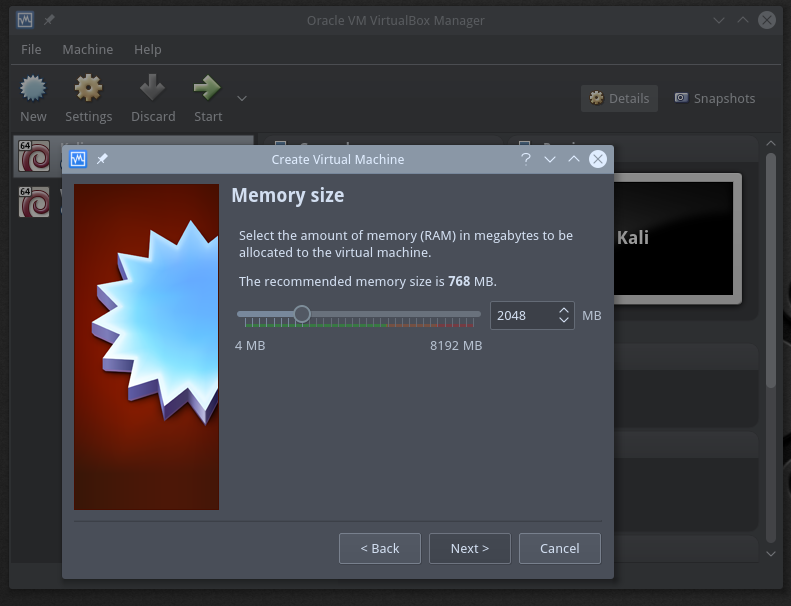
Select 2GB of RAM
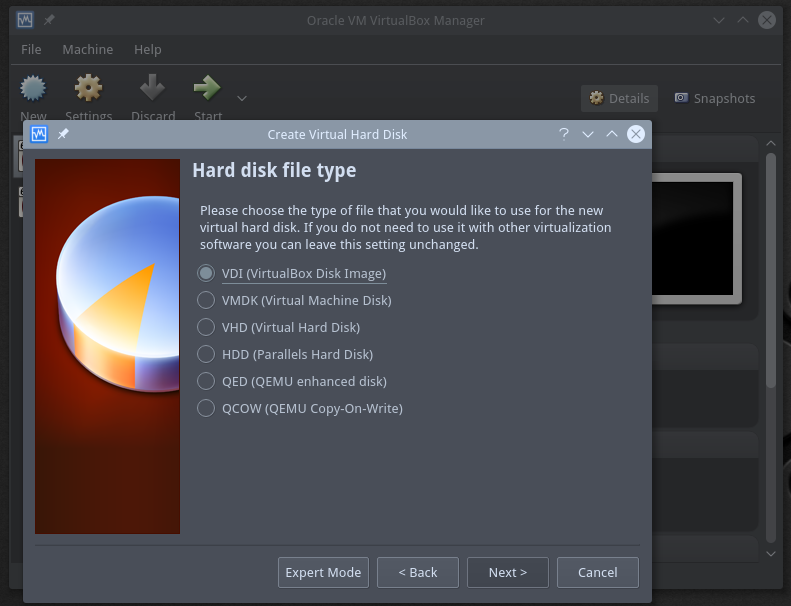
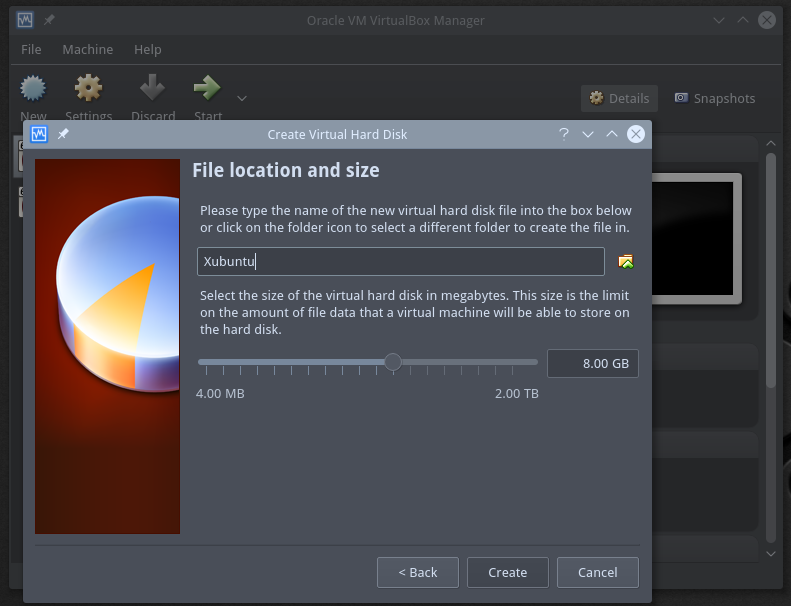
Create a virtual hard disk as a VDI (VirtualBox Disk Image)
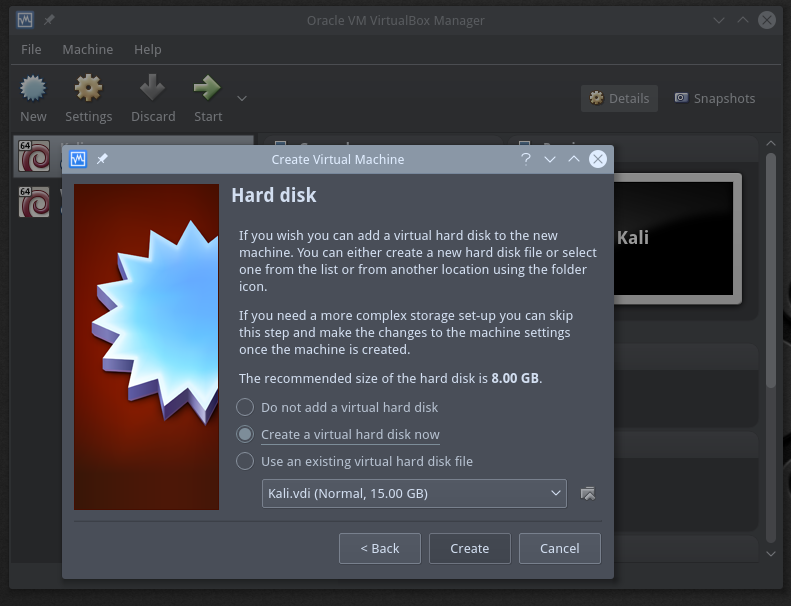
Create an 8GB, dynamically allocated hard disk.

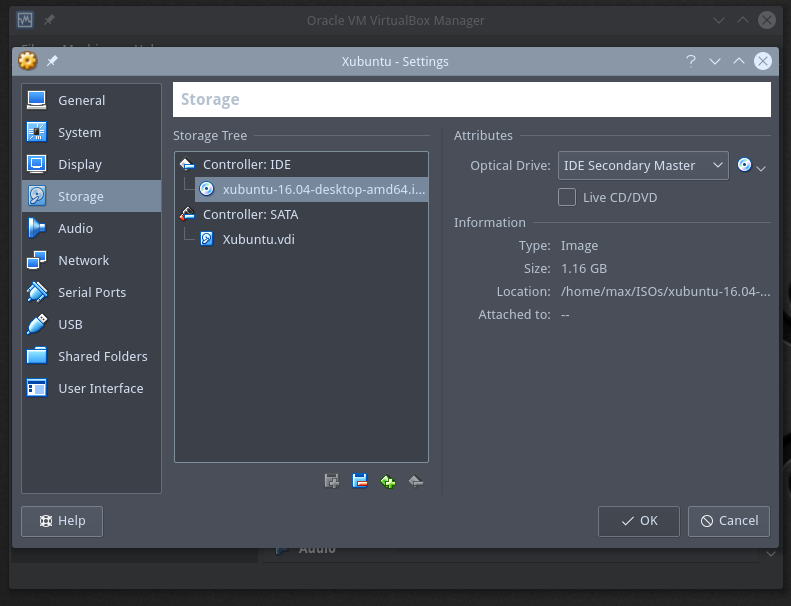
Now, click on “Settings”, then the “Storage” tab. Click the CD icon to the right of the Optical Drive menu, and browse to the location of the ISO image of the Linux distribution you wish to install. After you select it, you should see the name of the ISO under the Controller:IDE drop down, like you can see on the screenshot here.
This loads the ISO into the virtual CD-ROM so we can boot from it.
Now click on the “Network” tab and select “Bridged Adapter” from the drop down menu, along with the name of the network interface that is connected to the internet on your host computer.
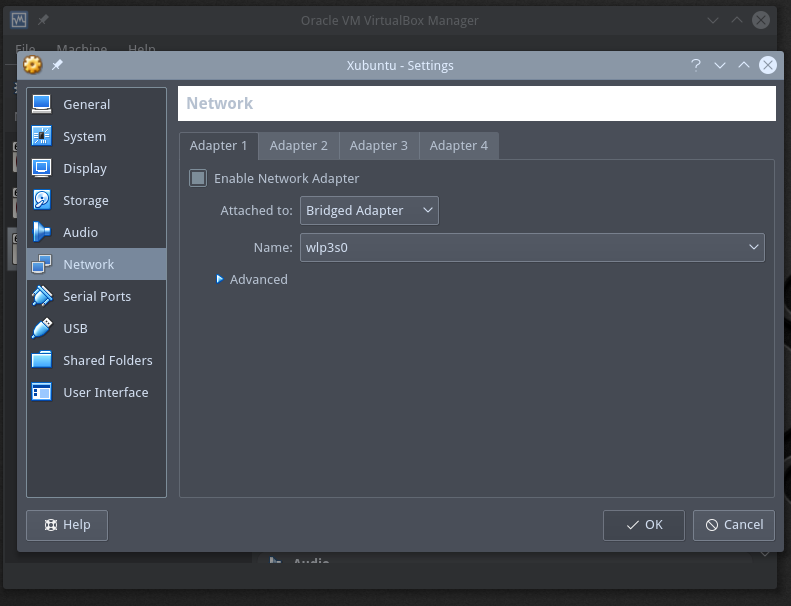
Click OK.
--------------------------------
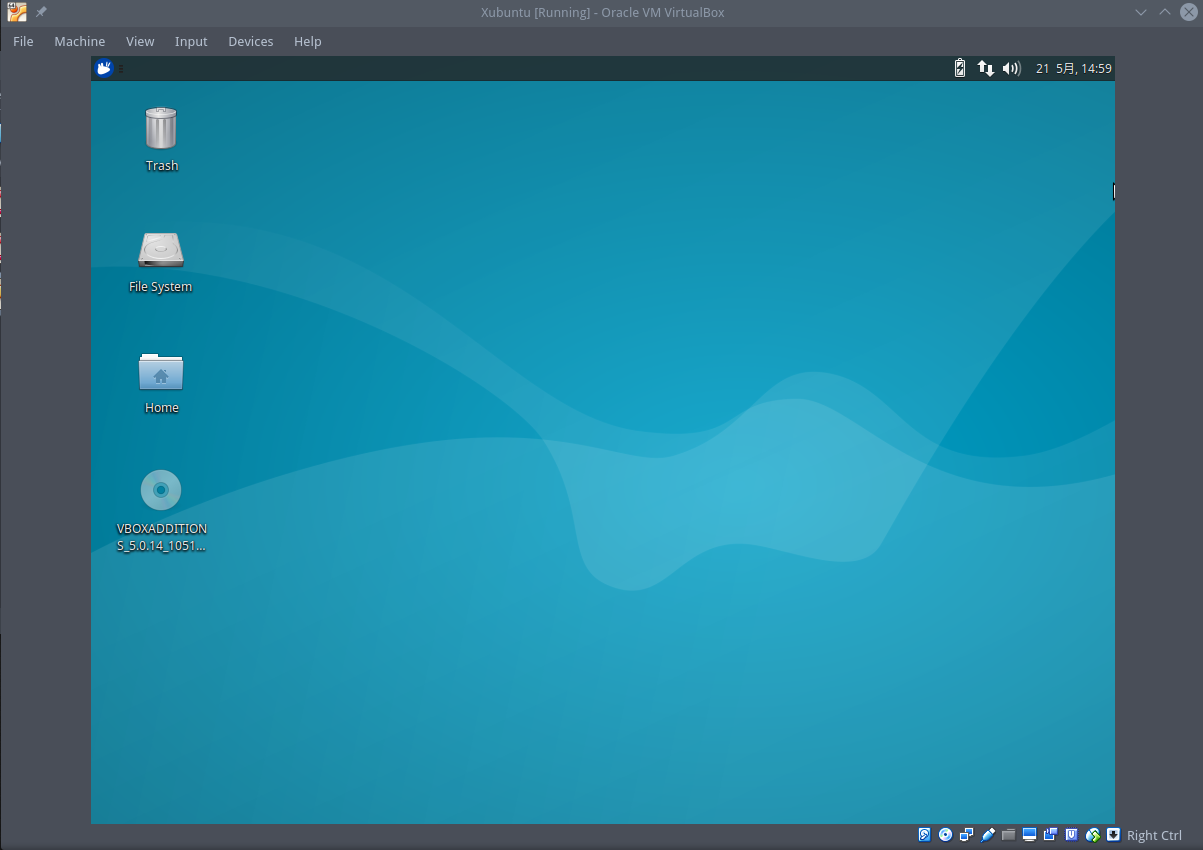
Now select the virtual computer from the list, and click the “Start” tab.
Xubuntu has a simple, easy to understand graphical installer, so I won’t put any screenshots up for that installation process.
Remember that it is using the Vitual Disk as its hard drive so it should state it hasn’t found an existing OS on the computer. At this point it is okay to erase and partion the virtual disk.
If you have any problems with the install see the Xubuntu help page.
--------------------------------
--[ Enabling Fullscreen in VirtualBox ]
There is an issue with VirtualBox that does not allow the screen resolution to change in the guest virtual computer. There is a fix though, I will go through it here.
First start up and login into the guest. Select “Devices > Insert Guest Additions CD image” on the VirtualBox top menu. You should see the Guest Additons CD appear on the Desktop.
Navigate using the terminal, where ‘username’ is your username:
$ cd /media/'username'/VBOXADDITIONS_5.0.14_105127Then execute the VirtualBox Linux Additions program:
$ sudo ./VBoxLinuxAdditions.run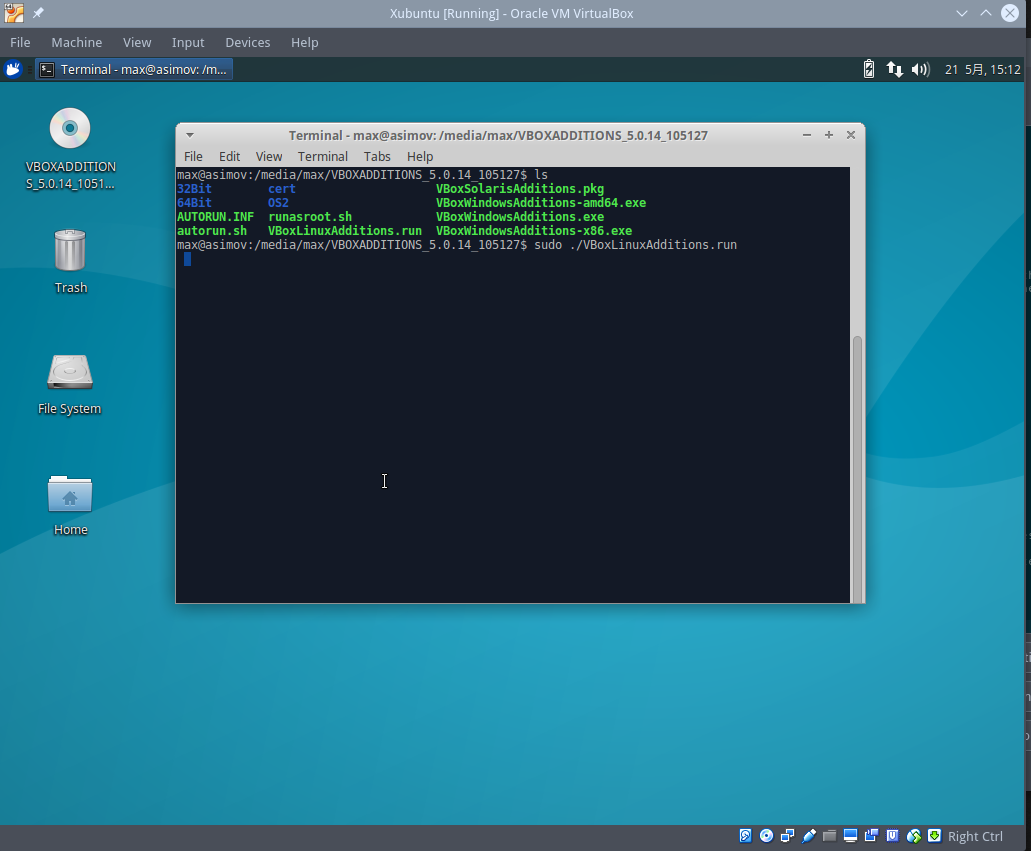
After this completes, shut down the guest computer and then on the HOST computer, where ‘1600,900’ is your maximum resolution, type:
$ VBoxManage setextradata global GUI/MaxGuestResolution '1600,900'Then restart the Xubuntu guest, and you should be able to use the guest at fullscreen resolution.
--------------------------------
--[ Learning to use Linux ]
Now that Xubuntu is up and running in VirtualBox, we can move to the next step. To learn more about Linux I read through The Linux Command Line by William Shotts, and have found it to be very helpful.
Also Reddit’s /r/Linux4Noobs, the Ubunutu Forums, and the humble google search are all excellent resources.
--------------------------------
--[ Learning a Scripting Language ]
PentesterLabs recommend either Ruby, Python, or Pearl. I chose Python, as it was recommended to me by various people in the industry, and the online community.
I worked through Learn Python the Hard Way by Zed Shaw. It took a few months, but by the end I was very confident in the basics, and being able to write decent scripts and basic programs. More importantly, it gave me the confidence and ability to read and understand Python code and where to look if I didn’t.
There has been some concern that Learn Python the Hard Way only focuses on Python 2 and not the updated Python 3. Shaw makes a good argument as to why he chose this way, but I decided to do some Python 3 as well to ensure I wasn’t being left behind.
I worked through Hacking Secret Ciphers with Python by Al Sweigart to better understand the basics of Python 3.
I enjoyed both, and got a lot out of the two books. These two, paired with a few online resources and some google-fu made me feel confident that I had “learned the basics” that PentesterLabs asks of me.
--------------------------------
/*** Part 2 - HTTP ***/
/*** Part 3 - PHP and DNS ***/
/*** Part 4 - SSL/TLS ***/
/*** Part 5.1 - SQL Injection ***/
/*** Part 5.2 - Local File Include ***/
/*** Part 6 - More SQL Injection ***/
/*** Part 7- FTP and Traffic Analysis COMING SOON ***/
--------------------------------
 Creative Commons Attribution 4.0 International License